Tuesday, September 25, 2012

Finding Base Locations


One very useful thing BWTA did was find the Baselocations on the map, places to build resource depots (hatchery, command center, nexus.) However, BWTA would sometimes place the baseloc on a suboptimal spot. The optimal spot to build a depot in every mineral cluster is the location that minimizes the distance to each mineral and vespene geyser. This problem is very easy for a human to solve, and seems to give BWTA-based bots some trouble.

I had a good idea how to solve this problem and I wondered if my solution would run into the same trouble, so I built a baselocation analyzer from scratch. The algorithm has 2 major steps. First I need to group the resources on the map into clusters. Then I can analyze each cluster in isolation and find the optimal spot to place a resource depot. The fact that this problem is trivial for a human to solve by inspection made it easy to   check accuracy by visualizing the data in graphical form.

Grouping resources into clusters

This was actually simple as I had already implemented the DBSCAN algorithm. I still needed to tweak the thresholds, as the previous incarnation was focused on clustering mobile units. I found it necessary to drastically raise the radius to 367 pixels due to a far away geyser in Tau Cross. The number of neighbors threshold I have at 3, and I reject all minerals with fewer than 250 remaining since the map Fortress has a few 249s that are only there to allow workers to pass through the gates into the expansions.

Once I had grouped the resources based on proximity, I had an issue to resolve. On Central Plains the two clusters at 6 o'clock were so close that they got merged into a single cluster. I separated such bridged clusters by ensuring that all resources in each cluster belonged to the same region. Thus it is important to tackle regions and choke points before base locations.

Finding Optimal Depot Positions

Now that the large set of resources has been segmented into smaller localized clusters, I am able to tackle each cluster in isolation. For each resource unit, I generated a potential field that decayed with distance. Resource depots cannot be built within 3 build tiles of resource units, so I generated a second field that wiped out the first within a radius of 3.

Now that I had the potential fields set up, all I had to do was sweep an area around each cluster and select the spot with highest potential, which would be where the summed field concentration is greatest. Since all resource depots are 4x3 build tiles in footprint, I checked the footprint to be sure that it was outside the 3-tile limit radius and also that it was on buildable terrain. For this case, walkability == buildabiliity. I initially tried to use BWAPI's isBuildable(x,y) function, but it seemed to take unexplored tiles as unbuildable, and I only wanted to work with static map data, so I ended up using isWalkable(x,y).

Results

The algorithm produced excellent results right away with no additional tuning required. Here are the images of detected base locations and the potential field overlaid onto the image of the map regions. I tested each map in the SSCAI 2012 tournament.

Benzene
Destination
Heartbreak Ridge
Neo Moon Glaive
Tau Cross
Andromeda
Circuit Breaker
Electric Circuit
Empire of the Sun
Icarus
Jade
Judgement Day
Python
Roadrunner
So far this algorithm has placed the base location in the optimal spot for each map that I have tested.

Wednesday, September 19, 2012

Analysis Results for SSCAI 2012 Maps

Results from my modified algorithm (based off Skynet). Details here and here. This is the set of maps to be used in the SSCAI competition. I am very happy with the results.

Benzene
Destination
Heartbreak Ridge
Neo Moon Glaive
Tau Cross
Andromeda
Circuit Breaker
Electric Circuit
Empire of the Sun
Icarus
Jade
Judgement Day
La Mancha 1.1
Python
Roadrunner

Tuesday, September 18, 2012

Choke Detection Tweaks

A statement I made earlier was incorrect: Skynet's algorithm does not find all regions first as BWTA does. Instead, it alternates, finding a region, then determining the limits of that region by closing it off with chokepoints. Thus the order of forming regions matters and will affect where the choke points are found. Skynet starts with the largest region and works its way down.

Two thresholds control the chokepoint detection process. The regionThreshold, originally set at 0.9, eliminates chokepoints that are too wide compared to the parent region. The tileThreshold controls how quickly the choke must widen out. It was originally 0.8, but changing it to 0.91 greatly improves accuracy over my map sample set.

 Orbital Relay is not shown since it remains identical.
 Python's top left resource area is now detected thanks to the bump to 0.91.

 Many changes in Tau Cross. The importance of the additional regions is that all resources are now partitioned into their own regions. I believe that this is important for strategic purposes.

Lost temple's center area is now cordoned off, which is the important part. It now looks similar to BWTA's output, but has extra regions. BWTA has an extra step in which it merges small regions together. I don't think it is necessary, since the AI should be able to deal with having extra regions. In any case, it is better to have too many divisions than too few.

Choke Detection Depends on Region Detection

I know why chokes are missing in Skynet's analysis. The algorithm finds regions first, then tries to narrow down where to choke should go between regions. The missing chokes are from missing regions - compared to BWTA's results.

These images are visualizations constructed by taking the number of adjacent tiles that have a different nearest obstacle. The colors start off deep blue for 0 and move up towards red. Pink circles are drawn at detected region centers. Compare these images with the chokes detected in my last post.

 You can see from the Orbital relay image that there are only 4 regions in the center ring, hence only 4 choke points dividing it, while BWTA must have found 8 regions.

 On Python it is apparent that the top left region has not been detected, explaining the lack of a choke there.

 On Tau Cross we see that there can be a choke point for every land path between two adjacent regions.

The lack of a bottom choke in the center area of Lost Temple is due to there only being one region center detected at the very bottom instead of in the middle intersection area. The algorithm decided to place the single choke a bit further south of the bottom entrance.

Adjusting the thresholds for what is considered a region will probably fix this issue. I am going to try to match BWTA's output.

Monday, September 17, 2012

A Comparison of BWTA and Skynet Map Analysis Algorithms

The pictures are laid out with Skynet's result on the left and BWTA on the right. BWTA has its resolution limited to build tiles instead of walk tiles. It's interface getRegion() function is the cause of this limit by only accepting build tile coordinates.

Orbital Relay
BWTA ignores the useless regions in the center and provides a more consistent division of the inner ring into 3-way intersections and elbows.

Python
BWTA again repeats its more consistent results by partitioning off the top left corner resource area, which Skynet missed.

Tau Cross
Again BWTA's partition of the regions is more logical. Though there is a useless 'appendix' on the bottom right. Importantly, all the resource clusters get their own region. I earlier said that the 3 sausage shaped regions have no defensible places to be split into regions, but creating individual regions around resources is sensible.

Lost Temple
Just as with Skynet, BWTA forgoes the bottom entrance to the center resource point. The results are nearly identical but for the wide choke closing off the bottom of the center resource area and a short passage. I think that BWTA's solution is closer to optimal since the center region does need to be closed off somehow.

BWTA has superior results in this short comparison. It appears that Skynet has missed a few chokes, perhaps the threshold is set too aggressively?

Sunday, September 16, 2012

First Look at Choke Detection Visualization

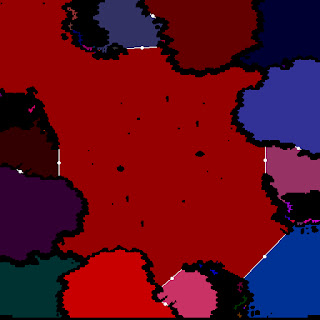
These are the results of step 3 in the map analysis algorithm used by the Skynet bot. Regions have been identified, largest first, by spreading out from local maxima until choke points are detected. In these images generated with CIMG, each region is assigned a separate color. Terrain not part of any region (impassable) is black. Centers of chokes are white circles, while a line is drawn between the two sides of the choke. It seems that the sides of the chokes are found by increasing radius search from the center until an impassable tile is found. The vector is then traced to the opposite direction until it finds the far side.
First up is Orbital Relay. The center ring has been broken up into 4 separate regions, and the choke lines are slanted to the human eye, but this could be a trick of the tile geometry.
Lost Temple's center area is missing a southern choke. Perhaps it is too wide, though I had thought the north and south entrances identical in width.
On Tau Cross, there is a division that cuts the northwest 'sausage' in half. Many humans would not have marked it as a choke, but it's not a significant impact on gameplay. Why is the northern green part sectioned off, when the protrusions of the south are not? It can be seen in the southwest the little tiny colored dots assigned to minuscule regions. Perhaps these insignificant areas should be ignored.
Python is dominated by a large central region. The northwest and southeast have resource clusters, so it might be wise to create separate regions, but their 'chokes' are indefensible. In this case we see what appears to be a thresholding issue, where the NW has no choke, but one is detected in the SE.

Skynet's terrain analysis package has done an acceptable job on these maps. Next time it will be directly compared against BWTA.

Saturday, September 15, 2012

Map Analysis - What Would Skynet Do?

In my last article, I wrote that BWTA and Skynet's map analysis methods are essentially the same. Both try to find the medial lines between obstructions. The clearance along the medial lines may then be used to detect choke points. Local minima tend to indicate chokes, while local maxima indicate the centers of large regions.

The first steps for each are very much the same: flood-fill the map to determine connectivity and find obstacles, then determine the medial lines between impassable areas. The execution of these concepts differs. BWTA vectorizes everything by turning connected regions into polygons, then using the CGAL library to calculate the Voronoi diagram between the obstacle polygons. The approach unfortunately is slow and crashes on too many maps. However BWTA does deliver excellent results when it works. The algorithm used in Skynet is discrete and performs its calculations directly on the map tiles. I am going to implement it and see how it compares to BWTA.

The flood-fill algorithm is easy to explain. Pick a tile, then assign it and all connected tiles a number. Repeat for any unvisited tiles, and you end up with every tile on the map labeled with its connectivity number. From any tile you can reach any other tile with the same number. I visualized this by assigning each number a separate color and by drawing an image where each pixel corresponds to a tile.

Next step is to generate a clearance map. Assign for each tile a number that represents the distance it is away from any obstacle. This can be done by setting each tile that borders an obstacle a distance of 1 tile, then propagating to adjacent tiles, adding 1 each iteration. Skynet's algorithm ignores all small obstacles from this calculation and counts distance in tenths of a tile, so two directly adjacent tiles would be 10 apart. This is so that diagonal tiles may be 14 apart. It also keeps track of where the nearest obstacle tile is from each tile, which will be important later on to find the medial lines.

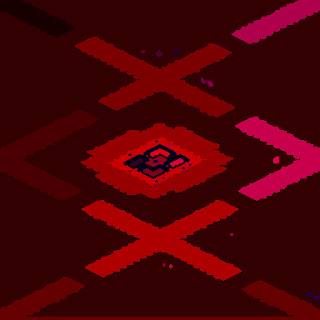
I visually represent the clearance map using a heatmap. Blue indicates close proximity to obstacles, while tiles with greater clearance turn green, then red for the centers of regions. Blue shapes in the interior of regions are the small obstacles ignored in the clearance calculation.

I start by using the Orbital Relay map because its clean lines and symmetry make it easier to spot any anomalies. At the top is the connectivity map and the clearance heatmap is on the bottom. It is easy to understand why the built-in analysis accessed through BWAPI regions classifies all of the center ring as a large chokepoint.
This is Lost Temple from the ICCup map pack. The chokes from the main bases may be clearly seen as fine threads.
 Tau Cross is going to be a hard one for algorithms to get right. There may be false chokes detected along the 3 long narrow areas in the middle.
 Python is the only one I tested where it is difficult to pick out the ramps to the main bases that can clearly be seen on the top connectivity map. It may be that the extremely large central region shifted the rest of the map closer to blue. Python should be another challenge to map analysis algorithms. I only want to find 8 chokes on this map, 1 for each main and natural. The NW and SE areas are too wide to be called chokes. The mouths leading to each natural are about as wide as choke points can get.